
(To view on YouTube, click HERE)
And here are some pictures of my card:


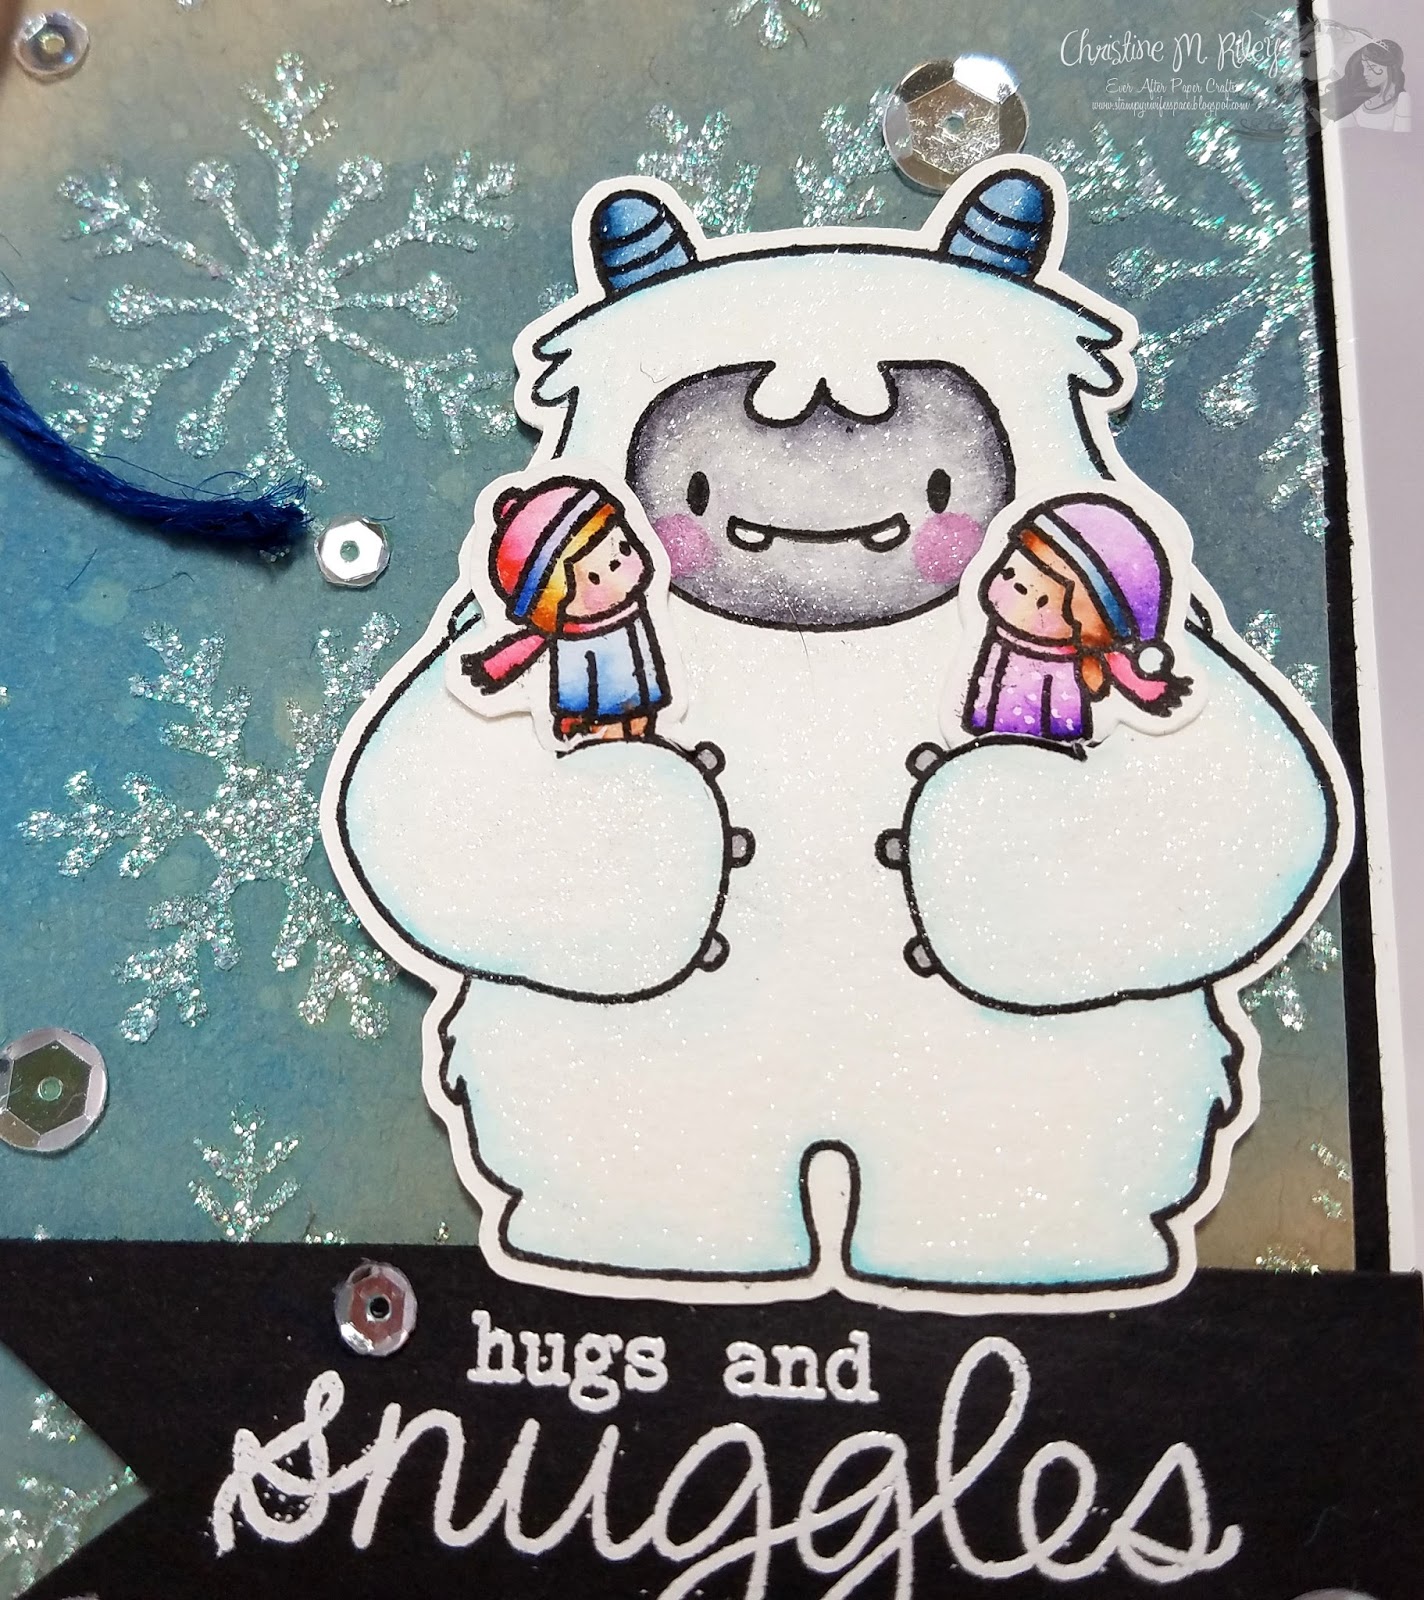


To create my card, I first cut a piece of Neenah Desert Sand Kraft Cardstock to 4" x 5 1/4". I then applied some Salty Ocean Distress Oxide Ink and some Faded Jeans Distress Oxide Ink to the Kraft cardstock and then added some water with my Distress sprayer for a little distress effect. I then used a snowflake stencil from EK Success, placed it on top of my Kraft cardstock, and added some Cosmic Shimmer Aurora Sparkle Texture Paste over the stencil to create the glitter snowflakes (you could use any embossing paste that you have for this technique). Next, I painted the Yeti with my Zig Clean Color Real Brush Markers and a water brush (I used Light Blue, Gray, Light Gray, Peacock Blue, and Sugared Almond Pink for the Yeti) and then coated him with my Wink of Stella Clear Glitter Brush. I so painted the little boy and the little girl (skin tones for both here Flesh Color, Blush, and Sugared Almond Pink; Girl's hat and jacket were Violet and Light Violet, scarf was Red, Hair was Dark Brown and Brown; Boy's hat and scarf were Red and Cornflower Blue, jacket was Cornflower Blue, Hair was Brown and Light Brown). I then cut the images out and cut slits in the arms with an Exacto knife so the kids could rest in the Yeti's arms. I then stamped my sentiment from the Sentiments from a Yet Stamp Set from Mama Elephant with Versamark ink onto black carestock and embossed it with white embossing powder. I tapered the end to give it a "V" shape and then adhered it and the Yeti onto the snowflake panel. I then adhered that to some black cardstock and then adhered the entire panel to a white A2 sized card base. I also added some dark blue twine to the top. What do you think?
Well, that's it from me today. Thanks so much as always for stopping by. Hugs!


No comments:
Post a Comment